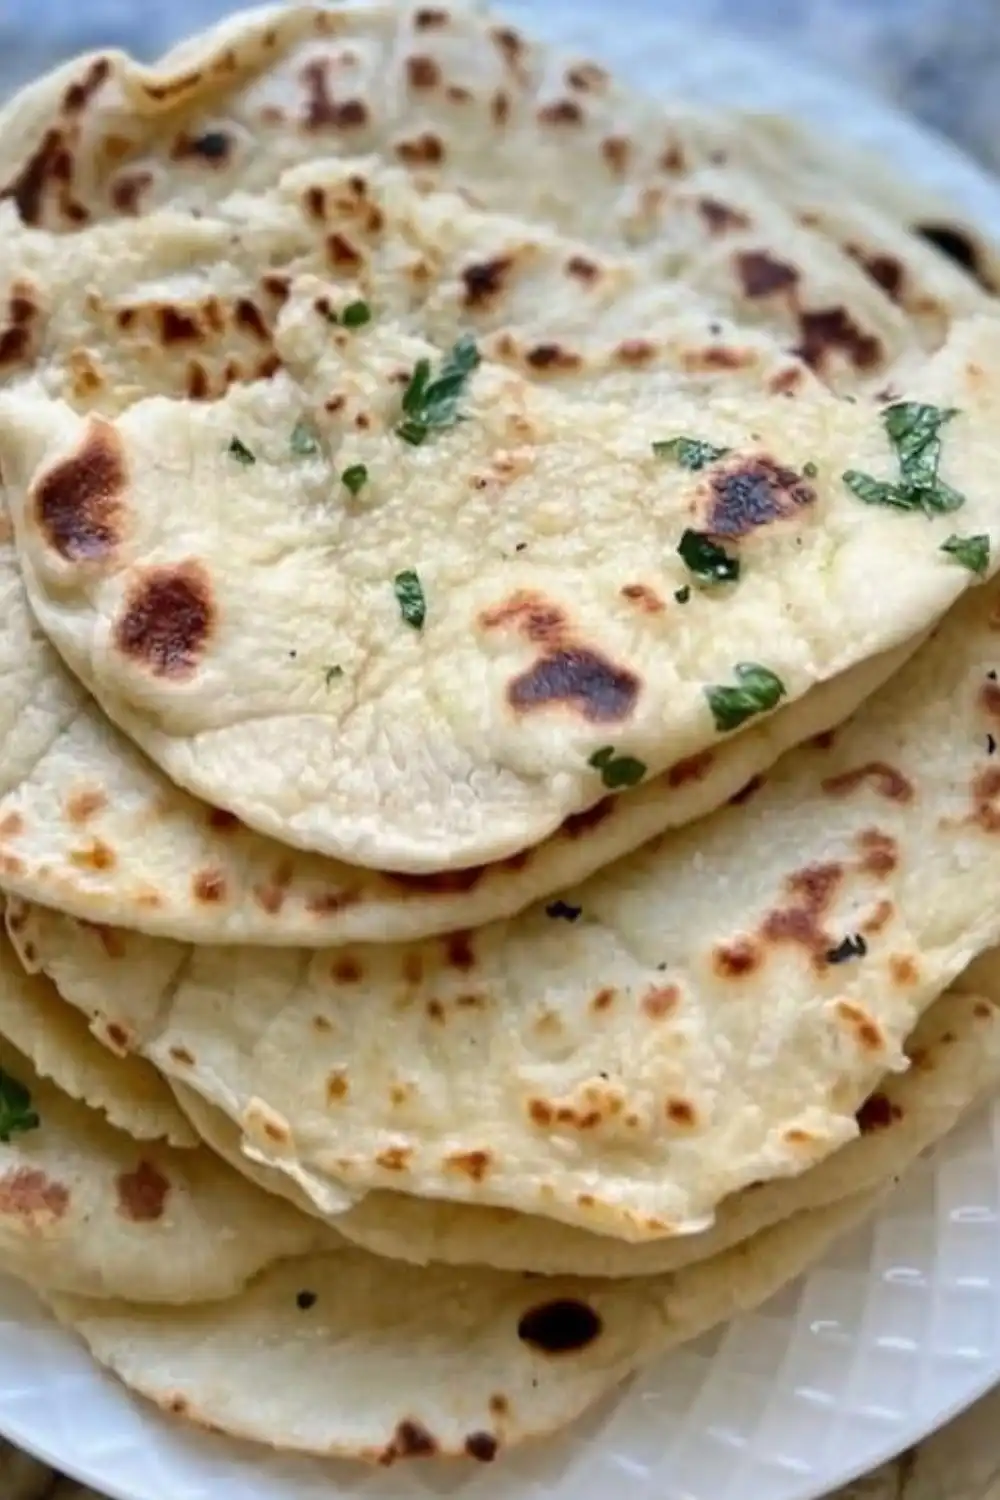

Pita bread, also known as Arabic bread or pocket bread, is a beloved staple across Middle Eastern and Mediterranean cuisines. This simple yet versatile flatbread is famous for its signature pocket perfect for stuffing with grilled meats, fresh veggies, hummus, or falafel. While store-bought pita is widely available, there’s something magical about making your own at home. Homemade pita bread is softer, fresher, and full of flavor with a delightful puff when baked right.
Whether you’re new to bread baking or an experienced cook, this ultimate pita bread recipe will guide you step-by-step to bakery-style results. All you need are basic ingredients, a bit of kneading, and a hot oven. Get ready to enjoy warm, fluffy pitas that puff up beautifully and taste like they came straight out of a traditional clay oven.
Let’s dive in and learn how to make the best homemade pita bread fresh, soft, and irresistibly good!
🍽️ Recipe Preparation Equipment
Before starting, gather the following tools and equipment to make the process smooth:
- Mixing bowls (large and medium)
- Measuring cups and spoons
- Digital kitchen scale (optional, for accuracy)
- Stand mixer with dough hook (optional but helpful)
- Rolling pin
- Clean kitchen towel or plastic wrap
- Oven-safe baking sheet or pizza stone
- Oven mitts
- Cooling rack
Having everything prepped beforehand ensures a stress-free baking experience and better results.
🧂 What You’ll Need to Prepare the Pita Bread Recipe ?
Here are the simple ingredients required for making traditional pita bread:
Ingredients:
- 3 ½ cups (420g) all-purpose flour (or bread flour for a chewier texture)
- 1 ½ teaspoons salt
- 1 tablespoon sugar or honey (for slight sweetness)
- 2 teaspoons instant yeast
- 1 ¼ cups warm water (110°F / 45°C)
- 2 tablespoons olive oil (plus more for greasing)
Optional:
- Semolina flour (for dusting)
These pantry-friendly ingredients come together to create incredibly soft, pillowy pita bread.
👨🍳 How to Make Easy Pita Bread Step-by-Step ?
Follow these detailed steps for perfect, puffed pita bread:
🔹 Step 1: Activate the Yeast (if using active dry yeast)
In a small bowl, mix warm water, sugar/honey, and yeast. Let sit for 5–10 minutes until foamy. If using instant yeast, skip this step and combine everything directly.
🔹 Step 2: Mix the Dough
In a large mixing bowl or stand mixer, combine flour and salt. Add yeast mixture (or dry yeast + warm water) and olive oil. Stir until a shaggy dough forms.
🔹 Step 3: Knead the Dough
Knead the dough for 8–10 minutes by hand (or 5–6 minutes in a mixer) until it’s smooth, soft, and elastic. Add a little more flour if sticky, but don’t overdo it.
🔹 Step 4: First Rise
Form the dough into a ball, place it in an oiled bowl, cover with a towel or plastic wrap, and let it rise for 1–1.5 hours in a warm area until doubled in size.
🔹 Step 5: Divide and Rest
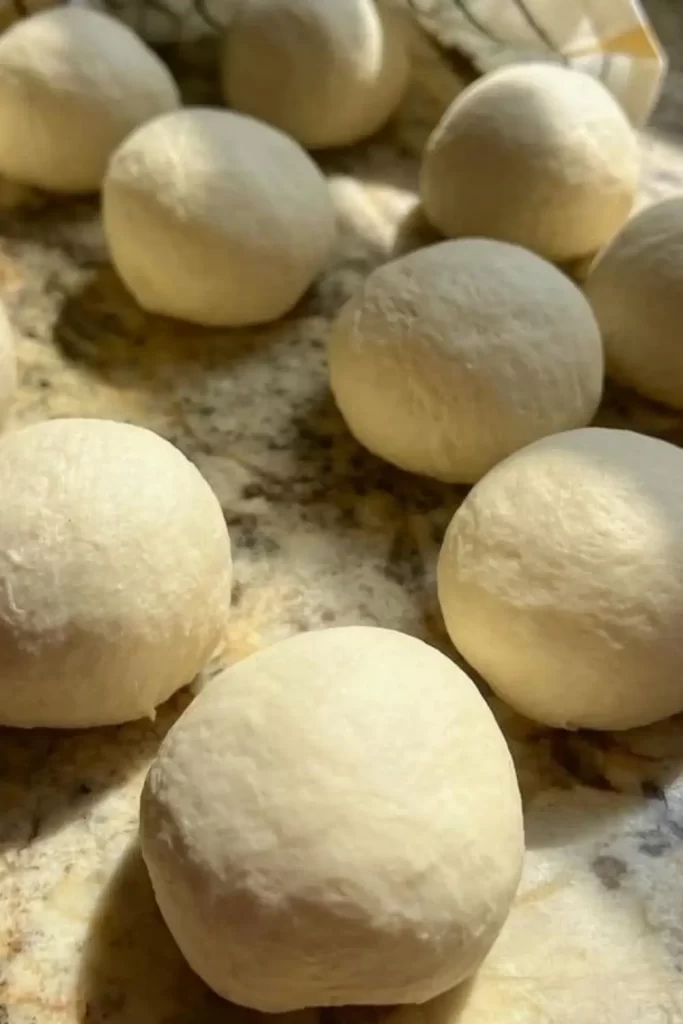
Punch down the dough and divide it into 8 equal pieces. Roll each into a ball. Cover and let them rest for 15–20 minutes to relax the gluten.
🔹 Step 6: Roll the Dough
Using a rolling pin, flatten each ball into a 6–8 inch circle, about ¼ inch thick. Dust with semolina or flour if needed.
🔹 Step 7: Preheat Oven or Skillet
Preheat your oven to its highest temperature (450–500°F / 230–260°C) with a baking sheet or pizza stone inside. Alternatively, heat a cast-iron skillet on high heat.
🔹 Step 8: Bake or Cook the Pitas
Transfer 1–2 rolled discs onto the hot baking surface. Bake for 2–3 minutes until puffed and lightly golden. If using a skillet, cook 1 minute per side.
🔹 Step 9: Cool and Store
Remove the pitas and place them on a clean kitchen towel. Cover to keep soft. Serve warm or store in an airtight container for up to 3 days.
🔄 Variations
Homemade pita bread is highly customizable to suit your flavor preferences and dietary needs. Here are a few delicious variations:
- Whole Wheat Pita: Replace up to 50% of the all-purpose flour with whole wheat flour for a nuttier flavor and added fiber.
- Herbed Pita: Mix fresh or dried herbs like oregano, thyme, or rosemary into the dough for an aromatic twist.
- Garlic Pita: Add minced garlic or garlic powder to the dough for a savory burst.
- Stuffed Pita: Roll two discs of dough with a bit of cheese, spinach, or za’atar in between before baking for a filled version.
- Mini Pitas: Create smaller 3–4 inch rounds for bite-sized snacks or kids’ lunchboxes.
With these tweaks, you can easily adapt the recipe for different occasions and palates.
🍳 Cooking Note
Achieving the perfect puff is the highlight of baking pita bread. The puff occurs when the heat creates steam inside the dough, separating the layers to form a pocket. Here are a few notes to help:
- Hot Oven or Skillet is Key: Ensure your baking surface is preheated thoroughly. A very hot surface helps form steam instantly.
- Roll Evenly: Uniform thickness prevents uneven cooking and supports the steam pocket formation.
- Don’t Over-Flour: Excess flour can hinder puffing. Use just enough to prevent sticking.
- Quick Bake Time: Pita bread bakes fast. Watch closely and remove once it puffs and slightly browns.
It might take a batch or two to perfect your technique, but once you master the puff, you’ll be baking these regularly!
🍽️ Serving Suggestions
Pita bread is incredibly versatile and pairs beautifully with countless dishes. Here are a few tasty ideas:
- Classic Falafel Wrap: Stuff with falafel, tahini, tomatoes, and lettuce.
- Grilled Meat Sandwiches: Fill with chicken shawarma, gyro meat, or kebabs.
- Mediterranean Dips: Serve with hummus, baba ganoush, or tzatziki as a tasty appetizer.
- Pita Pizza: Top with sauce, cheese, and toppings for a quick personal pizza.
- Pita Chips: Cut into wedges, brush with olive oil, and bake for crunchy dippers.
Freshly baked pita enhances every meal and makes everyday dishes feel special.
💡 Helpful Tips
Here are expert tips to ensure your pita bread turns out perfect every time:
- Use Warm Water: Too hot or too cold water can kill the yeast. Aim for 110°F (43°C).
- Knead Well: This develops gluten and helps form structure for puffing.
- Let the Dough Rest: This step is crucial for soft, pliable dough and proper rise.
- Check Your Yeast: Make sure your yeast is fresh and active for proper leavening.
- Don’t Skip Preheating: A cold oven or pan won’t create the needed steam burst.
- Cover After Baking: Wrapping in a towel while warm helps retain moisture and softness.
- Use a Pizza Stone if Available: It distributes heat evenly and mimics traditional ovens.
Remember, even if your pitas don’t puff every time, they’ll still taste amazing!
🥇 Tips for the Best Pita Bread
For irresistibly soft and puffy pita bread, follow these best-practice tips:
- Room Temperature Dough: Cold dough won’t puff. Let it rest before baking.
- Avoid Over-Rolling: Overworked dough may lose air and not rise properly.
- Moisture Matters: Keep dough covered during resting to prevent drying out.
- Work Quickly: Once rolled, bake the dough within 15 minutes for best results.
- Storage: Store in a ziplock bag or airtight container. Reheat gently before serving.
Follow these tips, and you’ll enjoy the softest, tastiest pita bread every single time!
⏱️ Timing Overview
- Prep Time: 15 minutes
- Rising Time: 90 minutes
- Resting Time: 20 minutes
- Cooking Time: 20 minutes
- Total Time: ~2 hours 25 minutes
🧾 Nutritional Information (per pita, approx.)
- Calories: 165 kcal
- Protein: 5g
- Sodium: 280mg
- Carbohydrates: 30g
- Fat: 3g
- Fiber: 1g
- Sugar: 1g
❓ FAQs
Why didn’t my pita bread puff?
Possible reasons include insufficient oven heat, under-kneading, or uneven rolling. Try again with a hotter oven and even thickness.
Can I freeze pita bread?
Yes! Let them cool completely, then wrap in foil or plastic wrap and freeze for up to 2 months. Reheat in a warm oven.
Can I make the dough in advance?
Yes. After kneading, refrigerate the dough overnight. Let it come to room temperature before rolling and baking.
Do I need a pizza stone?
Not required, but it helps with even heat and better puffing. A preheated baking sheet works well too.
Can I use gluten-free flour?
Pita relies on gluten for the pocket. A gluten-free version may work but won’t puff the same way.
🧡 Conclusion
Making pita bread at home is a rewarding, delicious experience. With simple ingredients and a bit of practice, you’ll soon master the art of soft, puffed pita that rivals any bakery version.
Whether you’re preparing a Middle Eastern feast or simply want fresh bread on hand, this recipe is your go-to guide. The soft interior, slightly chewy texture, and delightful pocket make it perfect for wraps, dips, or snacks.
Try it today and see how easy and satisfying it is to create authentic pita bread from scratch. Once you’ve had homemade pita, you’ll never go back to store-bought again!
Print
Perfect Homemade Pita Bread Recipe
- Total Time: ~2 hours 25 minutes
Ingredients
- 3 ½ cups (420g) all-purpose flour (or bread flour for a chewier texture)
- 1 ½ teaspoons salt
- 1 tablespoon sugar or honey (for slight sweetness)
- 2 teaspoons instant yeast
- 1 ¼ cups warm water (110°F / 45°C)
- 2 tablespoons olive oil (plus more for greasing)
Optional:
- Semolina flour (for dusting)
Instructions
🔹 Step 1: Activate the Yeast (if using active dry yeast)
In a small bowl, mix warm water, sugar/honey, and yeast. Let sit for 5–10 minutes until foamy. If using instant yeast, skip this step and combine everything directly.
🔹 Step 2: Mix the Dough
In a large mixing bowl or stand mixer, combine flour and salt. Add yeast mixture (or dry yeast + warm water) and olive oil. Stir until a shaggy dough forms.
🔹 Step 3: Knead the Dough
Knead the dough for 8–10 minutes by hand (or 5–6 minutes in a mixer) until it’s smooth, soft, and elastic. Add a little more flour if sticky, but don’t overdo it.
🔹 Step 4: First Rise
Form the dough into a ball, place it in an oiled bowl, cover with a towel or plastic wrap, and let it rise for 1–1.5 hours in a warm area until doubled in size.
🔹 Step 5: Divide and Rest
Punch down the dough and divide it into 8 equal pieces. Roll each into a ball. Cover and let them rest for 15–20 minutes to relax the gluten.
🔹 Step 6: Roll the Dough
Using a rolling pin, flatten each ball into a 6–8 inch circle, about ¼ inch thick. Dust with semolina or flour if needed.
🔹 Step 7: Preheat Oven or Skillet
Preheat your oven to its highest temperature (450–500°F / 230–260°C) with a baking sheet or pizza stone inside. Alternatively, heat a cast-iron skillet on high heat.
🔹 Step 8: Bake or Cook the Pitas
Transfer 1–2 rolled discs onto the hot baking surface. Bake for 2–3 minutes until puffed and lightly golden. If using a skillet, cook 1 minute per side.
🔹 Step 9: Cool and Store
Remove the pitas and place them on a clean kitchen towel. Cover to keep soft. Serve warm or store in an airtight container for up to 3 days.
- Prep Time: 15 minutes
- Rising Time: 90 minutes
- Cook Time: 20 minutes
- Category: Breakfast
- Cuisine: Americans
Nutrition
- Calories: 165 kcal
- Sugar: 1g
- Sodium: 280mg
- Fat: 3g
- Carbohydrates: 30g
- Fiber: 1g
- Protein: 5g
Keywords: Perfect Homemade Pita Bread Recipe