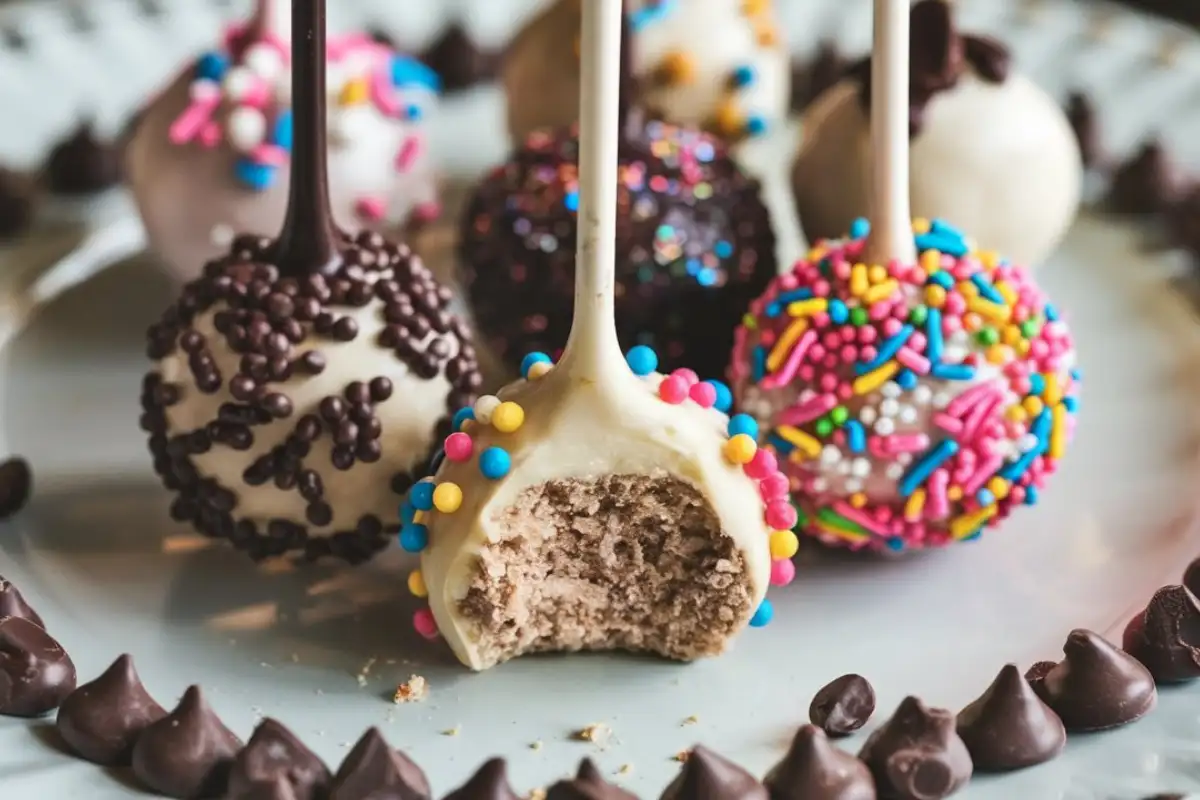
What not to do when making cake pops? This is a crucial question for anyone who’s ventured into the world of cake pop making. These delightful bite-sized treats, which marry the flavors of cake and lollipops, are deceptively simple but can easily go wrong. Whether you’re aiming for a batch to celebrate a special occasion or simply want to indulge in a fun baking project, avoiding common mistakes is key to success.
In this comprehensive guide, we’ll explore what not to do when making cake pops? ensuring that yours turn out perfectly every time.
The Importance of Choosing the Right Cake Base
Avoid Using Pre-Frosted Store-Bought Cakes
It might be tempting to grab a pre-frosted store-bought cake as a shortcut when making cake pops, but this is one of the first things not to do when making cake pops. These cakes often have a high moisture content, which can make your cake pops too soggy to hold their shape. Moreover, the existing frosting may not blend well with the additional frosting you’ll need to add, resulting in an overly wet or dense texture.
- Tip: If convenience is important, opt for a plain store-bought cake without frosting. Crumble it yourself, and mix it with homemade frosting to achieve the perfect texture.
Don’t Skip the Crumbly Texture
The key to great cake pops lies in the texture of the crumbled cake. It should be fine and even, without large chunks or lumps. Skipping this step or not crumbling the cake thoroughly enough is a common mistake that can make the cake pops difficult to shape and more likely to fall apart.
- Tip: Use your hands, a fork, or even a food processor to break down the cake into fine crumbs. The more even the texture, the better the binding with the frosting will be, resulting in smooth, well-formed cake pops.
Avoiding Mistakes in Preparing the Frosting
Steer Clear of Store-Bought Frosting
Another common mistake when making cake pops is using store-bought frosting. While it might seem convenient, store-bought frosting often has a different consistency than what you need for cake pops. It can be too sweet, too soft, or lack the right binding properties, making it harder to achieve the perfect balance in your cake pops.
- Tip: Make your frosting at home. Not only does this give you control over the texture and sweetness, but it also allows you to adjust the consistency to better suit the crumbled cake. A simple buttercream or cream cheese frosting can work wonders.
Don’t Overdo the Frosting
One of the most common pitfalls in cake pop making is adding too much frosting to the crumbled cake. The frosting’s role is to act as a binder, not the main component. Adding too much frosting can turn your cake mixture into a mushy mess, making it difficult to form sturdy cake balls that hold their shape.
- Tip: Start with a small amount of frosting and gradually add more until the mixture just sticks together. You’re looking for a texture that is moist enough to hold its shape but not so wet that it feels sticky or gooey.

Forming the Cake Balls: The Do’s and Don’ts
Don’t Make the Balls Too Big
One of the biggest mistakes in making cake pops is forming the balls too large. Oversized cake balls can become heavy, causing them to slide off the sticks during dipping or even crack under their own weight.
- Tip: A good rule of thumb is to keep the cake balls about 1 inch in diameter, which is roughly the size of a small ice cream scoop. This size is ideal for maintaining the structural integrity of the cake pop and ensuring even coating.
Ensure Uniformity in Size and Shape
Uniformity is crucial when making cake pops, both for aesthetic reasons and to ensure they cook or freeze evenly. Uneven cake balls may not only look odd but can also cause problems during dipping, such as cracking or uneven coating.
- Tip: Use a spring-loaded scoop to ensure that each cake ball is the same size. If you want to be even more precise, you can weigh each ball to ensure uniformity.
Common Mistakes When Inserting the Sticks
Don’t Skip the Candy Coating on Sticks
One of the most effective tricks to ensure your cake pops stay securely on their sticks is to dip the sticks in melted candy coating before inserting them into the cake balls. This step acts as a glue, helping the stick stay in place throughout the dipping and decorating process.
- Tip: Insert the stick about halfway into the cake ball after dipping it in the melted coating. This technique will help anchor the stick and prevent the cake pop from falling apart.
Avoid Inserting Sticks Incorrectly
The depth and angle at which you insert the sticks are crucial. If the stick is inserted too shallowly, the cake pop may fall off during dipping. Conversely, if the stick is inserted too deeply, it can poke through the other side of the cake ball, ruining its appearance.
- Tip: Aim to insert the stick about halfway through the cake ball. Ensure that the stick is centered and straight to provide maximum support.
The Crucial Step of Chilling the Cake Balls
Don’t Overchill or Underchill
Proper chilling is essential for ensuring that the cake balls hold their shape during dipping. However, there’s a fine line between chilling and overchilling. If the cake balls are overchilled, the candy coating can crack when dipped due to the sudden temperature change. If they are underchilled, they may fall apart during dipping.
- Tip: Chill the cake balls in the refrigerator for about 30 minutes, or until they are firm but not frozen. If you’re in a rush, a quick chill in the freezer for 10-15 minutes can work, but avoid letting them freeze completely.
The Importance of Setting Time
Allowing enough time for the cake balls to set is important for the structure and stability of the cake pops. Rushing this step can lead to various issues, such as cracks in the coating or the cake balls falling off the sticks.
- Tip: Patience is key. Allow the cake balls to chill thoroughly before dipping them in the coating. This will ensure that they maintain their shape and that the coating adheres properly.
Issues with Dipping and Coating
Don’t Overheat the Candy Melts
Overheating candy melts is a common mistake that can ruin the coating for your cake pops. If the candy melts are overheated, they can become too thick or even seize, making it difficult to achieve a smooth, even coating.
- Tip: Melt the candy in small increments, stirring frequently to ensure even heating. A microwave works well for this—heat the candy in 30-second intervals on medium power, stirring after each interval.
Avoid Contaminating the Coating
Contamination of the candy coating can occur if crumbs from the cake balls mix in, leading to a gritty texture and an unappealing appearance. This not only affects the look of your cake pops but can also make the coating difficult to work with.
- Tip: Work with a small batch of cake balls at a time, keeping the rest chilled until you’re ready to dip them. This will help minimize the risk of crumbs getting into the coating.
Don’t Rush the Dipping Process
Dipping cake pops requires patience and precision. Rushing through this step can lead to uneven coating, air bubbles, or even the cake ball falling off the stick.
- Tip: Dip each cake pop in one smooth motion, then gently tap off the excess coating. Rotate the stick as you tap to ensure an even layer of coating.

Decorating Mistakes to Avoid
Avoid Decorating While Coating is Wet
Timing is everything when it comes to decorating cake pops. If you add sprinkles or other decorations while the coating is too wet, they can slide off or cause the coating to crack. However, if you wait too long, the coating may harden, making it difficult for decorations to adhere.
- Tip: Allow the coating to set for a few seconds before adding decorations, ensuring it’s tacky enough to hold them in place without causing cracks.
Don’t Overdo the Decorations
While it can be tempting to go all out with decorations, too much can overwhelm the delicate flavor of the cake pop and create a cluttered appearance.
- Tip: Opt for simple, elegant decorations that enhance rather than overpower the cake pop. A drizzle of contrasting chocolate or a sprinkle of edible glitter can add a touch of flair without overwhelming the treat.
Proper Storage of Cake Pops
Don’t Store in a Humid Environment
Storing cake pops in a humid environment can cause the candy coating to become sticky and the cake to absorb moisture, leading to a soggy texture. Humidity can be a cake pop’s worst enemy, ruining both the appearance and the taste.
Avoid Freezing Already Dipped Pops
Freezing dipped cake pops is another common mistake that can lead to cracked coatings. The expansion of the cake inside the coating as it freezes can cause the coating to crack, resulting in a less-than-perfect finish.
What Not to Do When Making Cake Pops? Storing Tips
Proper storage is essential for maintaining the quality and freshness of your cake pops. Even if you’ve nailed every step in the preparation and decoration process, incorrect storage can undo all your hard work. Understanding the common pitfalls in storing cake pops will help ensure they remain as delicious as the day they were made.
Don’t Store in a Humid Environment
Humidity is one of the biggest enemies of cake pops. When stored in a humid environment, the candy coating on your cake pops can become sticky and start to melt. This not only affects the appearance of your cake pops but also their texture and taste. The cake inside can also absorb moisture from the air, leading to a soggy and unappetizing texture.
- Tip: To prevent this, store your cake pops in a cool, dry place. If you live in a humid climate or are storing them in a location with high humidity, place the cake pops in an airtight container lined with paper towels. The paper towels will help absorb excess moisture, keeping the cake pops dry and fresh. Refrigeration can also help, but ensure that the container is well-sealed to prevent the cake pops from drying out or absorbing other odors from the fridge.
Avoid Freezing Already Dipped Pops
While freezing cake pops might seem like a convenient way to extend their shelf life, it can lead to problems, particularly with the candy coating. When cake pops are frozen, the cake inside expands, which can cause the coating to crack. As the cake pops thaw, condensation can form on the surface, leading to a sticky and uneven coating.
- Tip: If you need to freeze your cake pops, it’s best to do so before they are dipped in the candy coating. Simply freeze the undipped cake balls in an airtight container for up to six weeks. When you’re ready to serve them, thaw the cake balls in the refrigerator before dipping them in fresh, melted candy coating. This method helps maintain the structural integrity and appearance of your cake pops.
Conclusion: Mastering Cake Pop Making by Avoiding Common Mistakes
Creating perfect cake pops is as much about avoiding mistakes as it is about following the correct steps. From choosing the right cake base to ensuring proper storage, each step in the process requires attention to detail and a bit of patience. By understanding what not to do when making cake pops? you can prevent common pitfalls and enjoy consistently beautiful and delicious treats.
Remember that practice makes perfect. If your first batch of cake pops doesn’t turn out exactly as you’d hoped, don’t be discouraged. Each mistake is a learning opportunity, bringing you one step closer to mastering the art of cake pop making. With time and experience, you’ll develop the skills and confidence needed to create cake pops that are as delightful to eat as they are to look at.


